COBRA DMX
DMX stands for "Digital Multiplex" and was created in the mid-80s as a standard communication protocol for controlling lighting fixtures. Since this time, the DMX protocol is used to control a variety of SPFX (special
effects) hardware devices such as lights, flame projectors, cryo jets, fog, spark, bubble machines (yes! even bubble machines), and more... A simple Amazon.com search for "DMX lights" shows the variety of devices
available for this protocol.
In short, the DMX is a way to control hardware devices that do cool and fun things. And, you can do all of this with COBRA together with pyrotechnics! In short, any device that supports a DMX input can integrate with
COBRA. If you are brand new to DMX, don't worry, we have explained everything below and, you can also contact us with any questions.
In order to use DMX, you must have the following:
- 18R2 running COBRA firmware version 6.0
- 36M or 72M firing module with the DMX Upgrade Kit
- DMX hardware devices (lights, flame, cryo, etc...)
- Scripting software such as COBRA Show Creator, Finale3D, or use Excel or a common text editor to create the raw CSV script format
COBRA DMX User Guide
36M/72M DMX Upgrade Kit
Connecting DMX Hardware
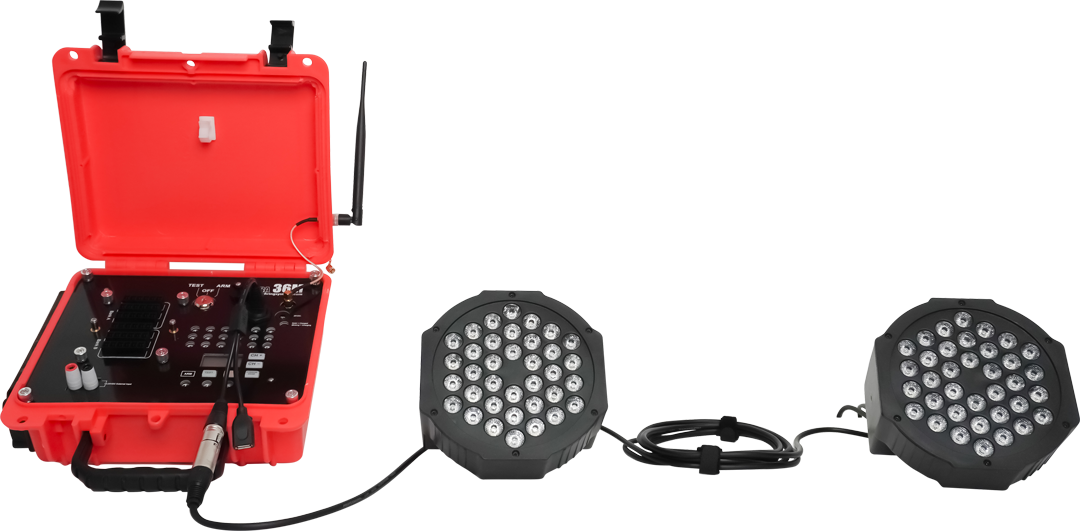
DMX is a digital feed you output from the 36M or 72M with the installed DMX Upgrade Kit. The upgrade kit includes a DMX Splitter Cable, which plugs into the 36M or 72M module RJ45 port. On the other end of the splitter cable is a USB / 3-pin XLR splitter. You can connect (daisy-chain) one or more DMX devices to the 3-pin XLR port using DMX XLR cables. On the last DMX hardware device in the daisy chain, make sure to connect the DMX terminator (included in the DMX upgrade kit). If you only have one DMX hardware device, we still suggest the DMX terminator.
Creating DMX Scripts
In order to use COBRA DMX, you must create a script using software such as
COBRA Show Creator,
Finale3D, or use Excel or a common text editor to create the raw
CSV script format. If you are new to scripting, please watch the following video:
COBRA Basics - Automated Show.
Each DMX event has the following attributes, explained below:
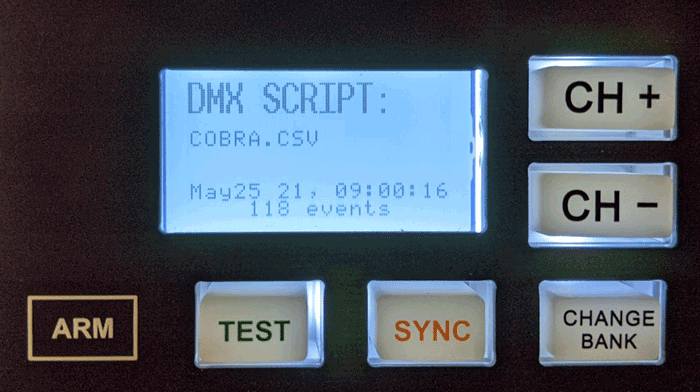
- DMX Universe - The DMX universe (1-99) is a way to limit which events are uploaded and outputted by specific COBRA 36M or 72M modules. Only events with the same DMX universe as the 36M/72M are uploaded to that module and outputted when the script runs. On the 36M/72M, there is an assigned DMX universe. You can access this by pressing the CHANGE BANK button until the DMX Universe displays. Then, by pressing CH+ or CH-, you can change the DMX universe assigned to the module.
- DMX Channel - The DMX channel is the unique channel you wish to control and set an associated value to. DMX channels range from 1 to 512. DMX hardware devices will occupy a minimum of one DMX channel and often occupy multiple channels. Think of the channel as a knob you can rotate to turn on and set to a specific level which is the DMX value, explained below.
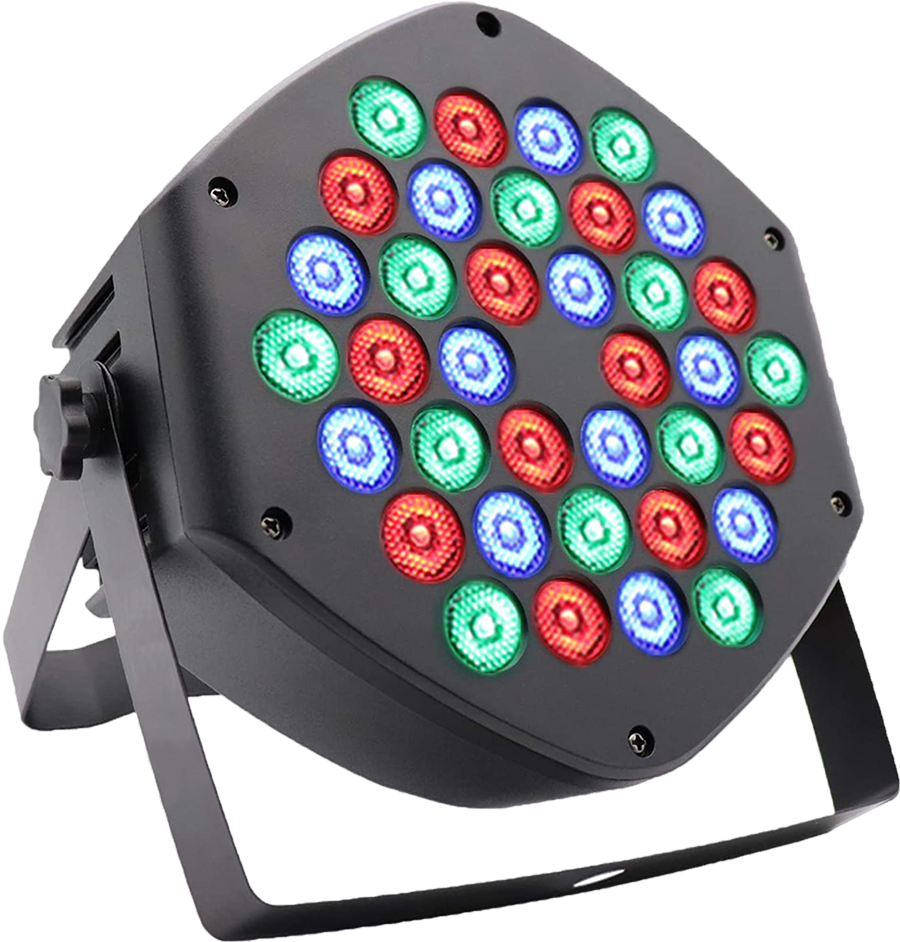
- DMX Value - The DMX value is a number 0-255 which sets the level of the associated event DMX channel. Every DMX hardware device has a documented channel and value range to perform specific functionality. For example, on a simple DMX RGB light, setting channel 1 to any value between 1 and 255 will act as a master "on" switch to the device. Then, setting channel 1 to a value between 1 and 255 will turn on and control the intensity of the red LED.
- DMX Pulse - The DMX pulse is the total length of time the associated DMX channel and DMX value is outputted from the module. The accepted format is MM:SS.XX. For example, 1 minute, 10.3 seconds is 01:10.30. By leaving this field blank, the DMX channel and value will be sent continuously until another event with the same DMX channel and value is sent.
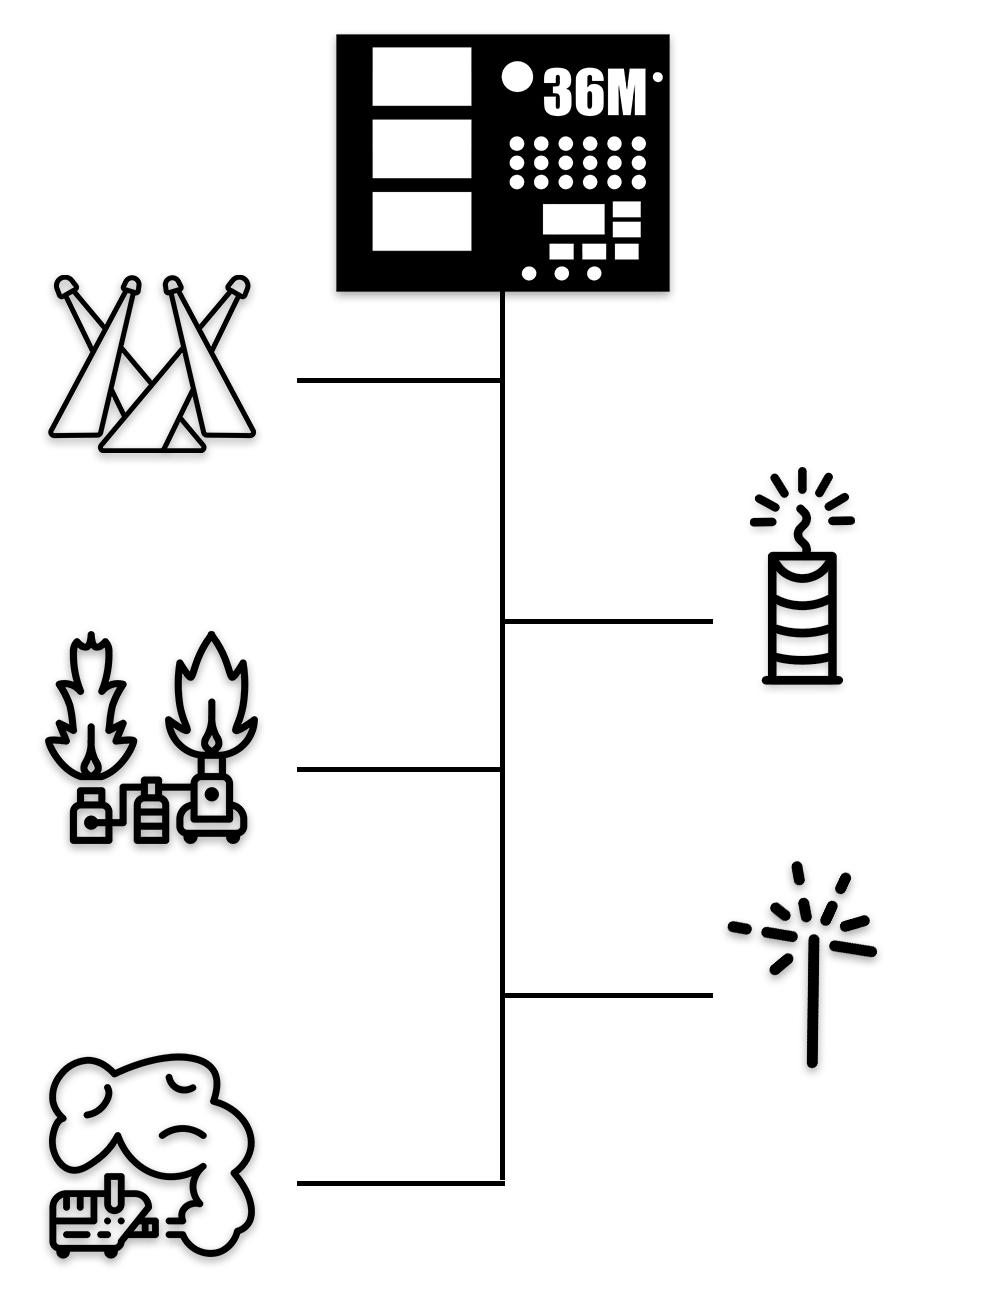
DMX Hardware Devices
There is a wide variety of DMX devices in the market. The most common include lights, flame projectors, cryo jets, fog machines, spark machines, and smoke machines. Every DMX device typically has an interface whereby the user can set the DMX channel which typically represents the starting channel as many DMX devices have multiple channels. For example, a simple fog machine may only have one channel where value 0 is off, and any value between 1 and 255 sets the fog to output at a set rate. However, an RGB lighting fixture with red, green, and blue lights may have upwards of six or more channels to control individual colors and other features such as strobing and reacting to other inputs such as audio. While more complex, the variety of DMX hardware and associated channels and values allows for a wide range of SPFX devices that can produce really cool and fun effects for your audience.
To learn more about DMX hardware devices, see Understanding DMX Hardware Devices.
Executing a DMX Script using the 18R2
Executing a DMX script using the 18R2 is the exact same process as executing a script using the 18R2. Arm the 18R2 and wait for all devices to appear in the device count. Once the total number of devices is displayed, press the trigger button on the trigger channel defined in your script.
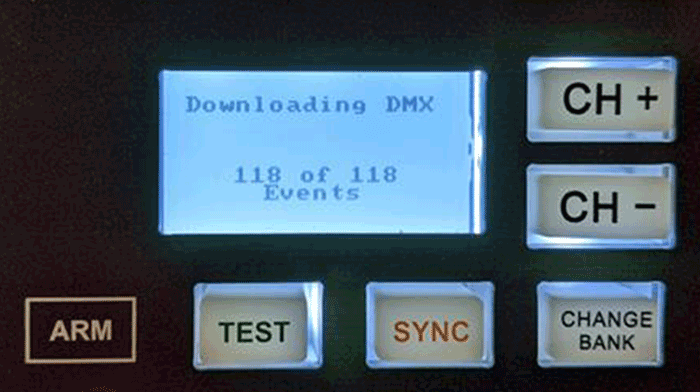
Since DMX scripts can contain high quantities of events, the 18R2 will load all DMX events into any 36M or 72M whose assigned DMX universe matches any event with the same DMX universe. For example, if a 36M is set to DMX universe 1, it will download all events from the 18R2 whose DMX universe is also set to 1. While events are loaded into the 36M, the LCD will show the current progress, as shown below. This process occurs when arming the 18R2 while the 36M/72M modules are also on and armed.
After DMX events are loaded to the 36M/72M module, they are saved into a special flash memory chip that remembers the script data even if the firing module is powered off or the batteries are removed. This happens in real-time while the 36M/72M modules are arming and depending on the number of DMX events, this can take several minutes. The benefit of saving this data to flash is avoiding having to re-send the DMX events to the modules later if the modules are powered off. Once the entire DMX script for the associated universe is saved to the 36M/72M module, the process for arming the modules from the 18R2 takes only a few seconds or the same amount of time to arm a normal pyro script.
To learn more about executing DMX scripts using your 18R2, please see Executing a DMX Script using the 18R2.